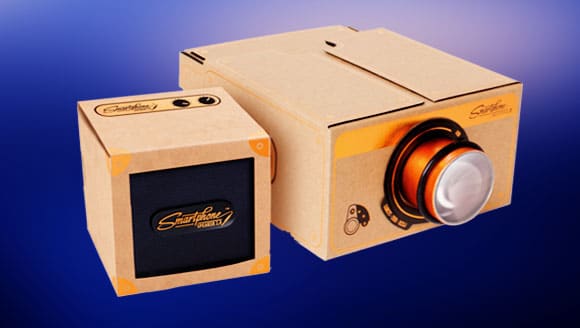
Projectors have become an essential asset in our lives and owning one is very also incredible. Sometimes you may want to watch your favorite movie and do not have enough funds to get one.
Who said you couldn’t make one? Well, there are so many ways to make simple homemade projectors for your use with available materials. Some of the important materials that you need for your use include the Smartphone, a magnifying lens, shoebox, and other tools. With these tools, you are able to follow the instructions given and make an incredible projector for you use at home.

DIY skills are very important to many people as you do not have to spend too much money and time but instead get an incredible skill and also something new to use at home. The homemade projector is incredible, and you can do it yourself, and by the end of the project, you are good to go.
Set Your Box And Lens
-
Shape the magnifying lens by cutting off the handle
 You should get a magnifying glass from the office if you have one or buy at any store that has them. Place the lens at the edge of the table and cut off the handle using a hacksaw.
Also if you have other available unused lenses at home, you may prefer to use them instead of too much work. If you are getting a lens from your home make sure it is one that you will not need to do something else with it as it will not be good to remove from the movie projector and in another object it may not work well again on the other object.
-
Make sure your shoebox is well glued on the sides
Get a shoebox in your home that you are not using any size that is sturdy. Make sure that the box is fitting match to the device you are going to use as the tablet, smartphones and others. In case the box is loose on the sides, stick it together using glue and hold it until they are stuck together really well.
-
Position the magnifying lens well in the shoebox
With your magnifying lens, on the one hand, place the box vertically on the table with one small side we placed on the table. Then place the magnifying lens on the other side at the top and trace using a pensile. After tracing the magnifying lens by making a circle on it, use a sharp object to cut through the traced circle well and precise. Make sure you follow the traced line well until it is completely removed from the box. Be careful while cutting the traced circle of the box not to damage the table with your knife or not to injure your hand. If you are kids make sure you have a grown up with you while making the projector.
-
Place your lens on the hole
Place your magnifying lens in a place where you have removed the box you traced. Make sure the side that you see through in the lens is placed inside partially. To hold the lens and the box together, you may use the hot glue gum or place dust tape at the edges of the lens together. Follow the line well and trace it with the hot glue to make sure it is fit for your placement.
-
Line the box with construction paper
Having measured the length and the width of the sides inside the shoebox, cut the construction paper using scissors to meet the measurement and fit the sides well. Make sure the inside of the box is well fit with the constriction paper. Sticks the construction papers with multipurpose glue and hold them together until they are stuck well at the edges inside the box.
Placing Your Devices In Place
-
Make sturdy foam for your Smartphone
 Gets foam that is thick from any store and cut it into pieces that will fit your phone using a knife or any sharp object. Be careful not to injure your hand while cutting it down especially if you are using the utility knife.
With foam that is cut 6.5-inch x 4 in, will make a stand that is large enough to hold the Smartphone or you may have to measure the device you are going to use and make a stand for it according to your measurement.
-
Glue it together
After measuring the foam well and getting them in the right size, it is time to stick them together for use. Arrange your foam to form a T shape upside down and stick it with hot glue. While placing the boards up down to form a T, the longest edge of the standing board running in the middle of the bottom board.
-
Strips of double-sided tape
Take a scissor and cut two strips of the double-sided tape about 15 cm long in length. Place them lengthwise along with the piece that is standing of your phone stand and stick them together. Then peel off the top paper to make it sticky to place your phone on it.
-
Set your device
After placing your phone in place in the shoebox, go to Settings on your device and adjust the brightness of your device. This could be achieved by going into the display and brightness in your device. You will find a where to adjust the brightness whether up or down the bar for brighter or lower brightness. When setting the brightness to make sure the brightness is too bright at its brightest mode to enable the images to be bright. This s because the lens will make the images to seem darkened while watching.
Watch Your Movie
-
Get a speaker
 There is no way you are going to watch a movie without the sound system available it would be too dull. Get a small speaker that is Bluetooth enabled to make the sound of your movie to be great and not muffled. Turn the speakers on and then go to your phone settings and allow Bluetooth connection and set a pair with it by finding the speaker name and then clicking connect the device and you are good to go.
-
Position the lens to face the wall
Since you are using the projector to watch your movie, you will have to position it to face a black wall or painted wall to watch your movie. The wall you are using should be white. If you do not want to paint your wall or remove the decorations on the wall, it is good to get a white sheet to do as a wall or screen for your movie.
-
Play your movie
From the app on your phone, start playing the movie you like, or you can even download the movie and start watching. Start your movie and see if the image is clear or not. If you find the movie is explicit, then go ahead and continue watching but if it is not clear adjust to make it be in the right position.
This could be done by moving your device closer or farther away from the lens to attain the right image size and clarity.
You May Also Like To Read:
- How Do You Turn Your Cell Phone Into a Projector?
- Why You Should Go For a Projector Instead of a TV?
- How Many Lumens Do You Need To Project In Daylight?
- Best Projector For iPhone
Myself Ruby Vivian, I am a BIGGER-screen enthusiast and I can’t lie. Served as an electric technician for 7 years now, and I loveee what I do. You can learn more about me here.