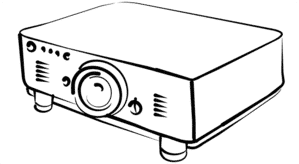
Projector has been one of the tools that we need to use at home or works places to achieve something significant. Over the passing years, it has become easier to connect our phone with the projector and use it to make the screen projection even bigger within a few minutes of connectivity.
Though we need the projector for our daily lives activities, sometimes the projector could be very expensive especially if you are struggling with your budgets. Why do you spend less than $10 to make your projector?
This is entirely possible with just materials available with you. Let’s have a look at some of the materials you will need for the projector to be complete and what to do. From here you will be able to make your projector and work with it accordingly
Materials you need
- Shoebox with cover
- Bulb
- Water
- Bottle top
- Phone
- Phone stand
- Pen
How To Make The Projector Step By Step
First of all, after you have gathered the material, you have to start with the things first like the box and the bulb. Take your bulb and remove the end cover of the bulb and remain with the glass side only. When you are done, place the glass part of the bulb at the box side that is smaller. Trace the bulb well from one side to the other using a pen to get the right shape and measurement of the bulb. Remove the box part from that you have traced using a razor or an actor knife.
Note: when you are cutting the end part of the bulb, and you are a child, make sure you have a grown-up around to help you with the knife.
When you remove the part you had traced, place the bulb in its place and make sure to have it fixed firmly. You can achieve this by taping the parts that are not covered by the bulb and then hold the bulb together tightly with the tape.
When you are done with placing the bulb firmly in place take a glass of clean water that has no impurity and pour it inside the bulb until full. When you pour the water inside do it carefully not pour water inside the box. Take a bottle top and close the top of the bulb with it. After than tape the bottle well to fit and be firm in its place.
When you are done with placing the stand inside the box, then it is time to test if the cover will fit the box again and to shape a hole that fits the bottle top. Therefore place the lid on top of the box and cut out the part you have traced of the bottle top and remove. After you removed the part slid the cover over to fit the box.
The reason why you are covering the box is that we have not covered inside the box with a dull color to avoid light dispersion. Therefore we have to cover the top of the box to allow the light produced by the phone inside the box does not disperse in a different direction and will enable the image on the screen to be well-sized on the wall.
After you are done preparing your projector, it is time then to have your show and movies started. Before you get started on the movies, you have to set the phone to work well with the projector. Go to your setting are make the phone to rotate to the right angle you like and then go to the movie app and start playing it. It is very important to know that the movie you are watching may be upside down on the wall. This is a fact since the glass inverse the images and for you to get the right position of the image ion the wall, place the phone upside down inside the box.
When you are up to the game with the projector you created the last thing you will do is sit down relax and enjoy. Though the sound may not be that great that you may need to connect to external speakers for the better sound system. As we have seen without a magnifying lens, you are able to get a projector using the bulb and get the same result of a great screen display.
You May Also Like To Read:
Myself Ruby Vivian, I am a BIGGER-screen enthusiast and I can’t lie. Served as an electric technician for 7 years now, and I loveee what I do. You can learn more about me here.